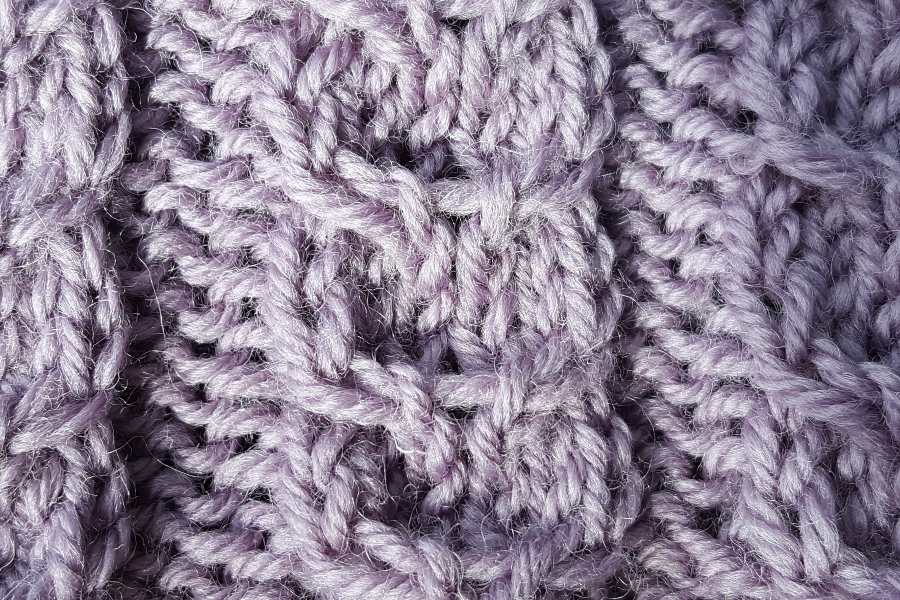
Claw Pattern Cable Knitting Stitch Pattern
- Home
- Knitting Stitch Patterns
- Cable Knitting Patterns
- Claw Pattern Cable Knitting Stitch Pattern
Quick Links
- Archived - Ask a Knitting Question
- Basic Knitting Stitches
- Beginner Knitting Patterns
- Knitting Abbreviations
- Needle Sizes Chart
- Tension Squares
- Yarn Comparison Chart
FYI: This site receives a small amount in commissions from affiliate links and third-party advertising.
The claw pattern is knitted over 9 stitches and 4 rows. This is a simple and effective cable stitch that can be done with or without a cable needle.
To use the claw pattern cable knitting stitch you will need to know how to cast on, cast off, how to form knit stitches, how to form purl stitches and how to use a cable needle. You could get someone else to do the casting on and off for you if you are just starting out, but believe me, eventually you will want to learn how to do these two steps yourself if you are going to keep knitting.
Instructions for the Claw Pattern Cable Knitting Stitch Pattern
1st row: (right side) : Knit.
2nd row: Purl.
3rd row: C4L, K1, C4R.
4th row: Purl.
Repeat these 4 rows.
C4L: Slip the next two stitches onto a cable needle and hold at the back of the work. Knit the next two stitches, then knit the two stitches off the cable needle.
C4R: Slip the next two stitches onto a cable needle and hold at the front of the work. Knit the next two stitches, then knit the two stitches off the cable needle.
Ideas for Where You can Use this Knitting Stitch Pattern...
This is a quite simple cable pattern but it is really quite effective. I have used it in the past down the centre of the sleeves of an other wise plain jumper to add a little interest or on either side of a larger more complex cable on the front and back of a jumper.
You just need to be careful if you are adding the cable as a feature on one of your favourite patterns, you may need to add a stitch or two as the cable causes the knitted fabric to be narrower than plain stocking stitch and without the adjustments your garment may end up being to narrow.
Couldn't Find What You Were Looking for?
Try searching the site using the search box below:

Recent Articles
-
Shetland Knitting and Shetland Knitters
Feb 07, 21 07:44 AM
Shetland knitting and the women in the Shetland Isle who create Shetland lace are among the best knitters in the world. -
Fixing Knitting Mistakes
Jan 28, 21 02:35 AM
When you are learning how to knit, you are going to make a few mistakes. It might not make you happy but fixing knitting mistakes is par for the course. -
Shetland Lace Knitting
Dec 11, 19 07:03 PM
Shetland Lace Knitting is a particular style of knitting that developed in the Shetland Islands and was one of the main exports of the Island early in the last century.
 >
>


